How to create browser extension. Part 2: publishing and analysis
In the first part of the article, I shared the process behind getting the idea, creating the plan, and developing the app itself.
In the second part, I will talk about publishing and what is involved in it.
Preparation
I planned to deploy extensions to 2 major platforms: Chrome and Mozilla.
To publish in both stores, you need to have a developer account. To create a Google dev account, you should pay 5$ fee. And Mozilla doesn't have any fees.
Creating production build
If you are using Plasmo you need to execute the following command:
pnpm plasmo build --zip
For Mozilla you would need to pass a browser target flag:
pnpm plasmo build --zip --target=firefox-mv2
I discovered --zip tag after I had already published the extension. It would save me some time for sure.
Note
Mozilla might throw an error to your .zip file. The reason for that is Mozilla requires you to zip individual files, instead of a whole project folder.
So if we have a folder project with index.js, index.css, you should not zip the whole project folder and should pick and zip individual files instead.
Preparing listing page
The next step is to create a listing page for the extension. You should see "New item" os something like this in your Chrome development console. Click it.
It will ask you to upload .zip file you have previously created. After uploading is finished you will see the rest of the listing page fields.
Here is how it looks:
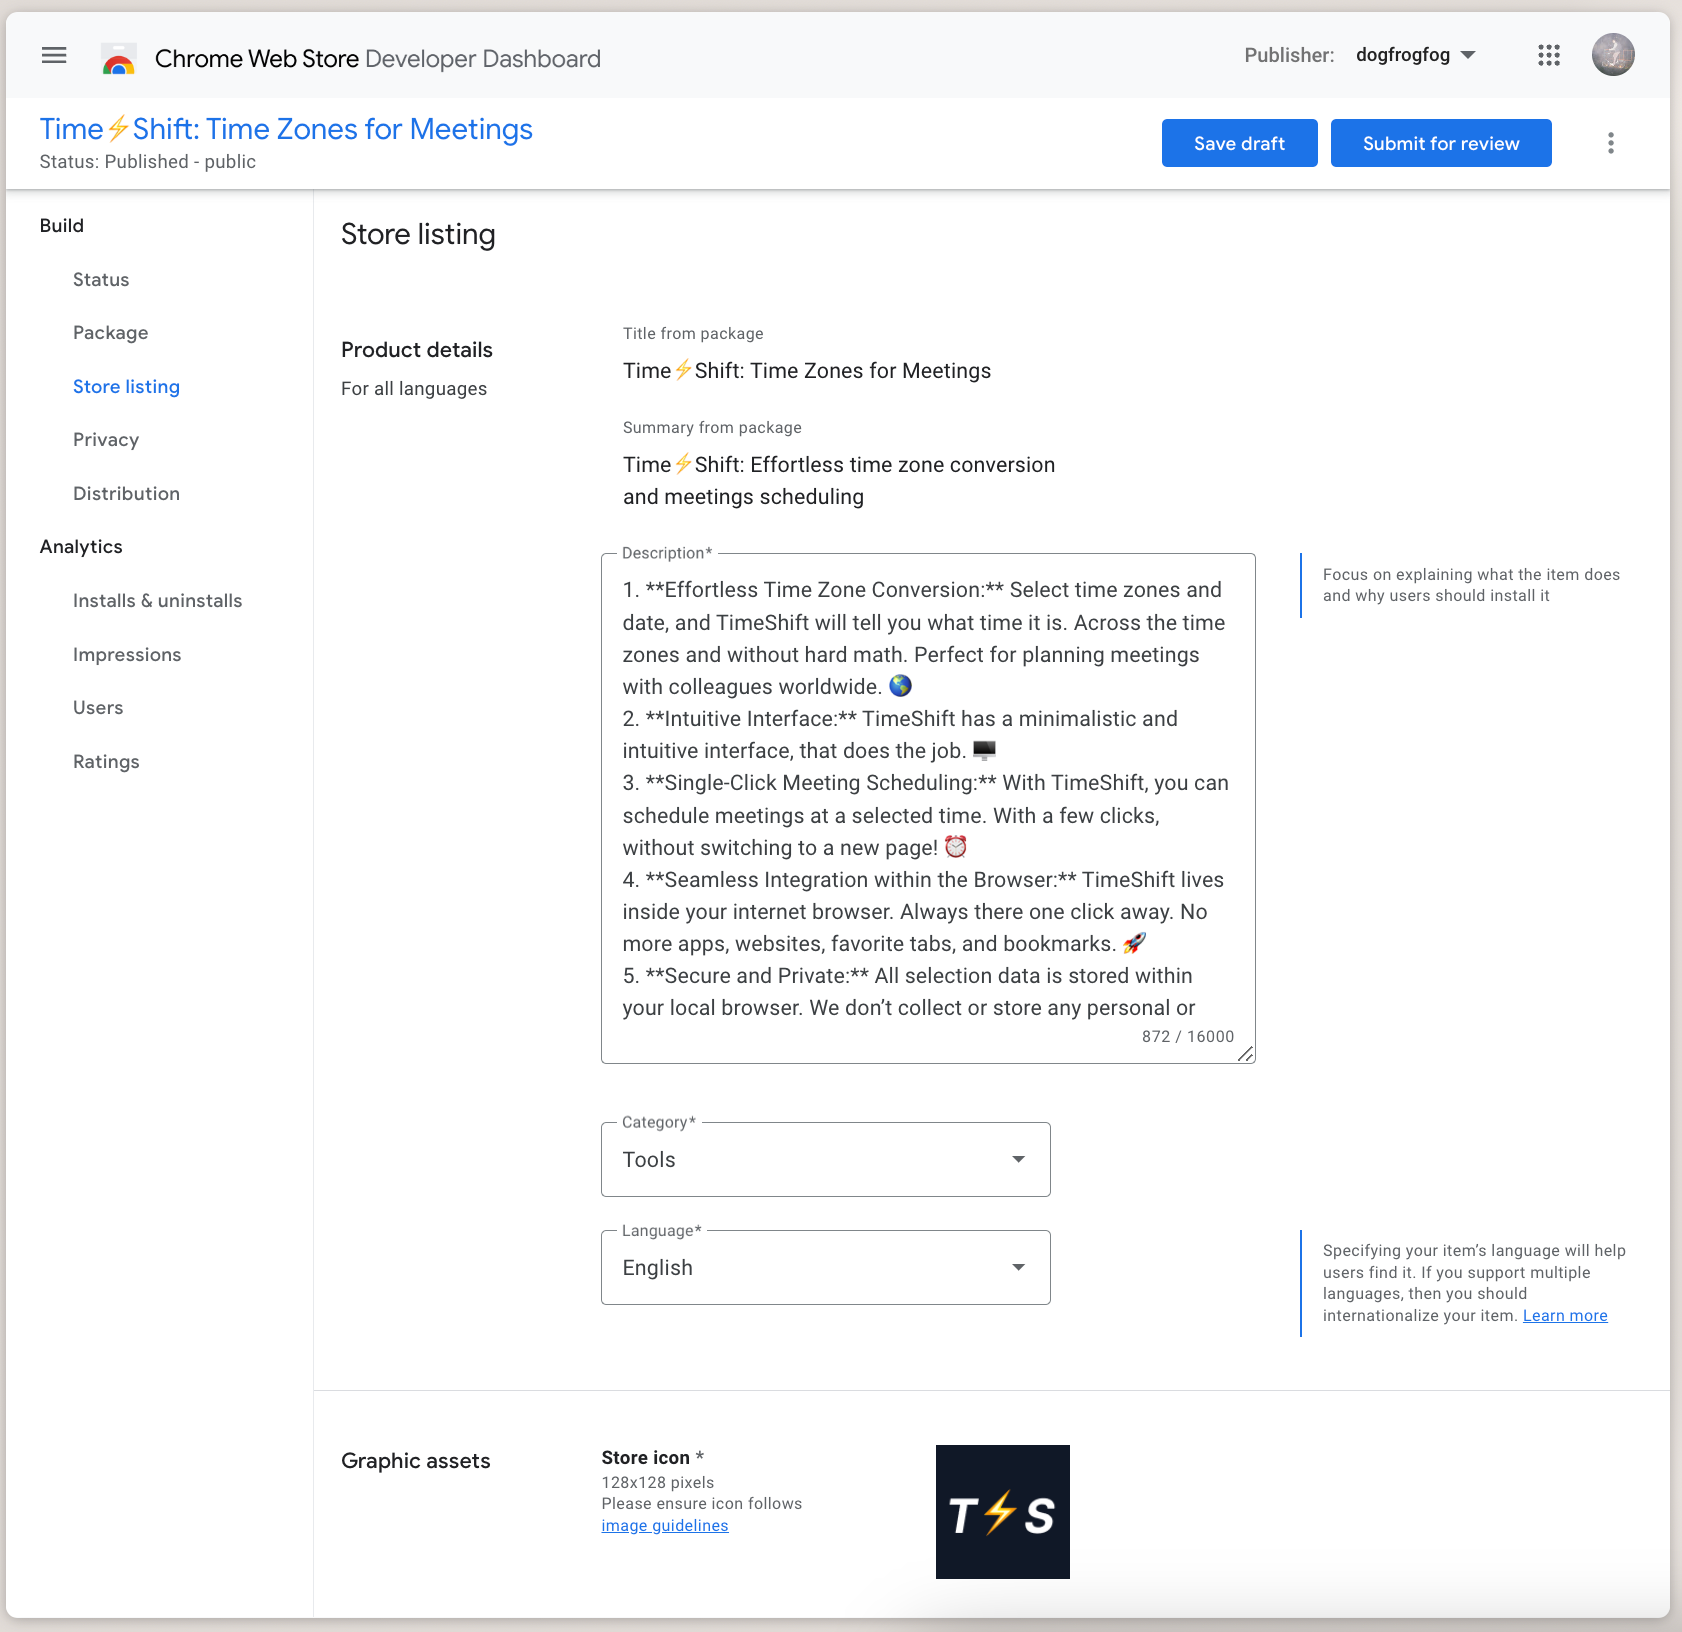
It's a simple form with such fields as title, description, category, images, etc.
Google has a perfect guide on how to make the best version of your extension page. There you find a detailed description of all the fields and assets you should prepare.
But the core of them are the following:
- icon
- promo video
- screenshots
- small promo tile
- marquee promo tile
https://developer.chrome.com/docs/webstore/best-listing
The number of assets you need to prepare is big, so it's better to start working on it in advance.
For images I used Figma, and for the video, I used a service called 123apps. This video editing platform is super easy and free to use.
https://online-video-cutter.com/add-music-to-video
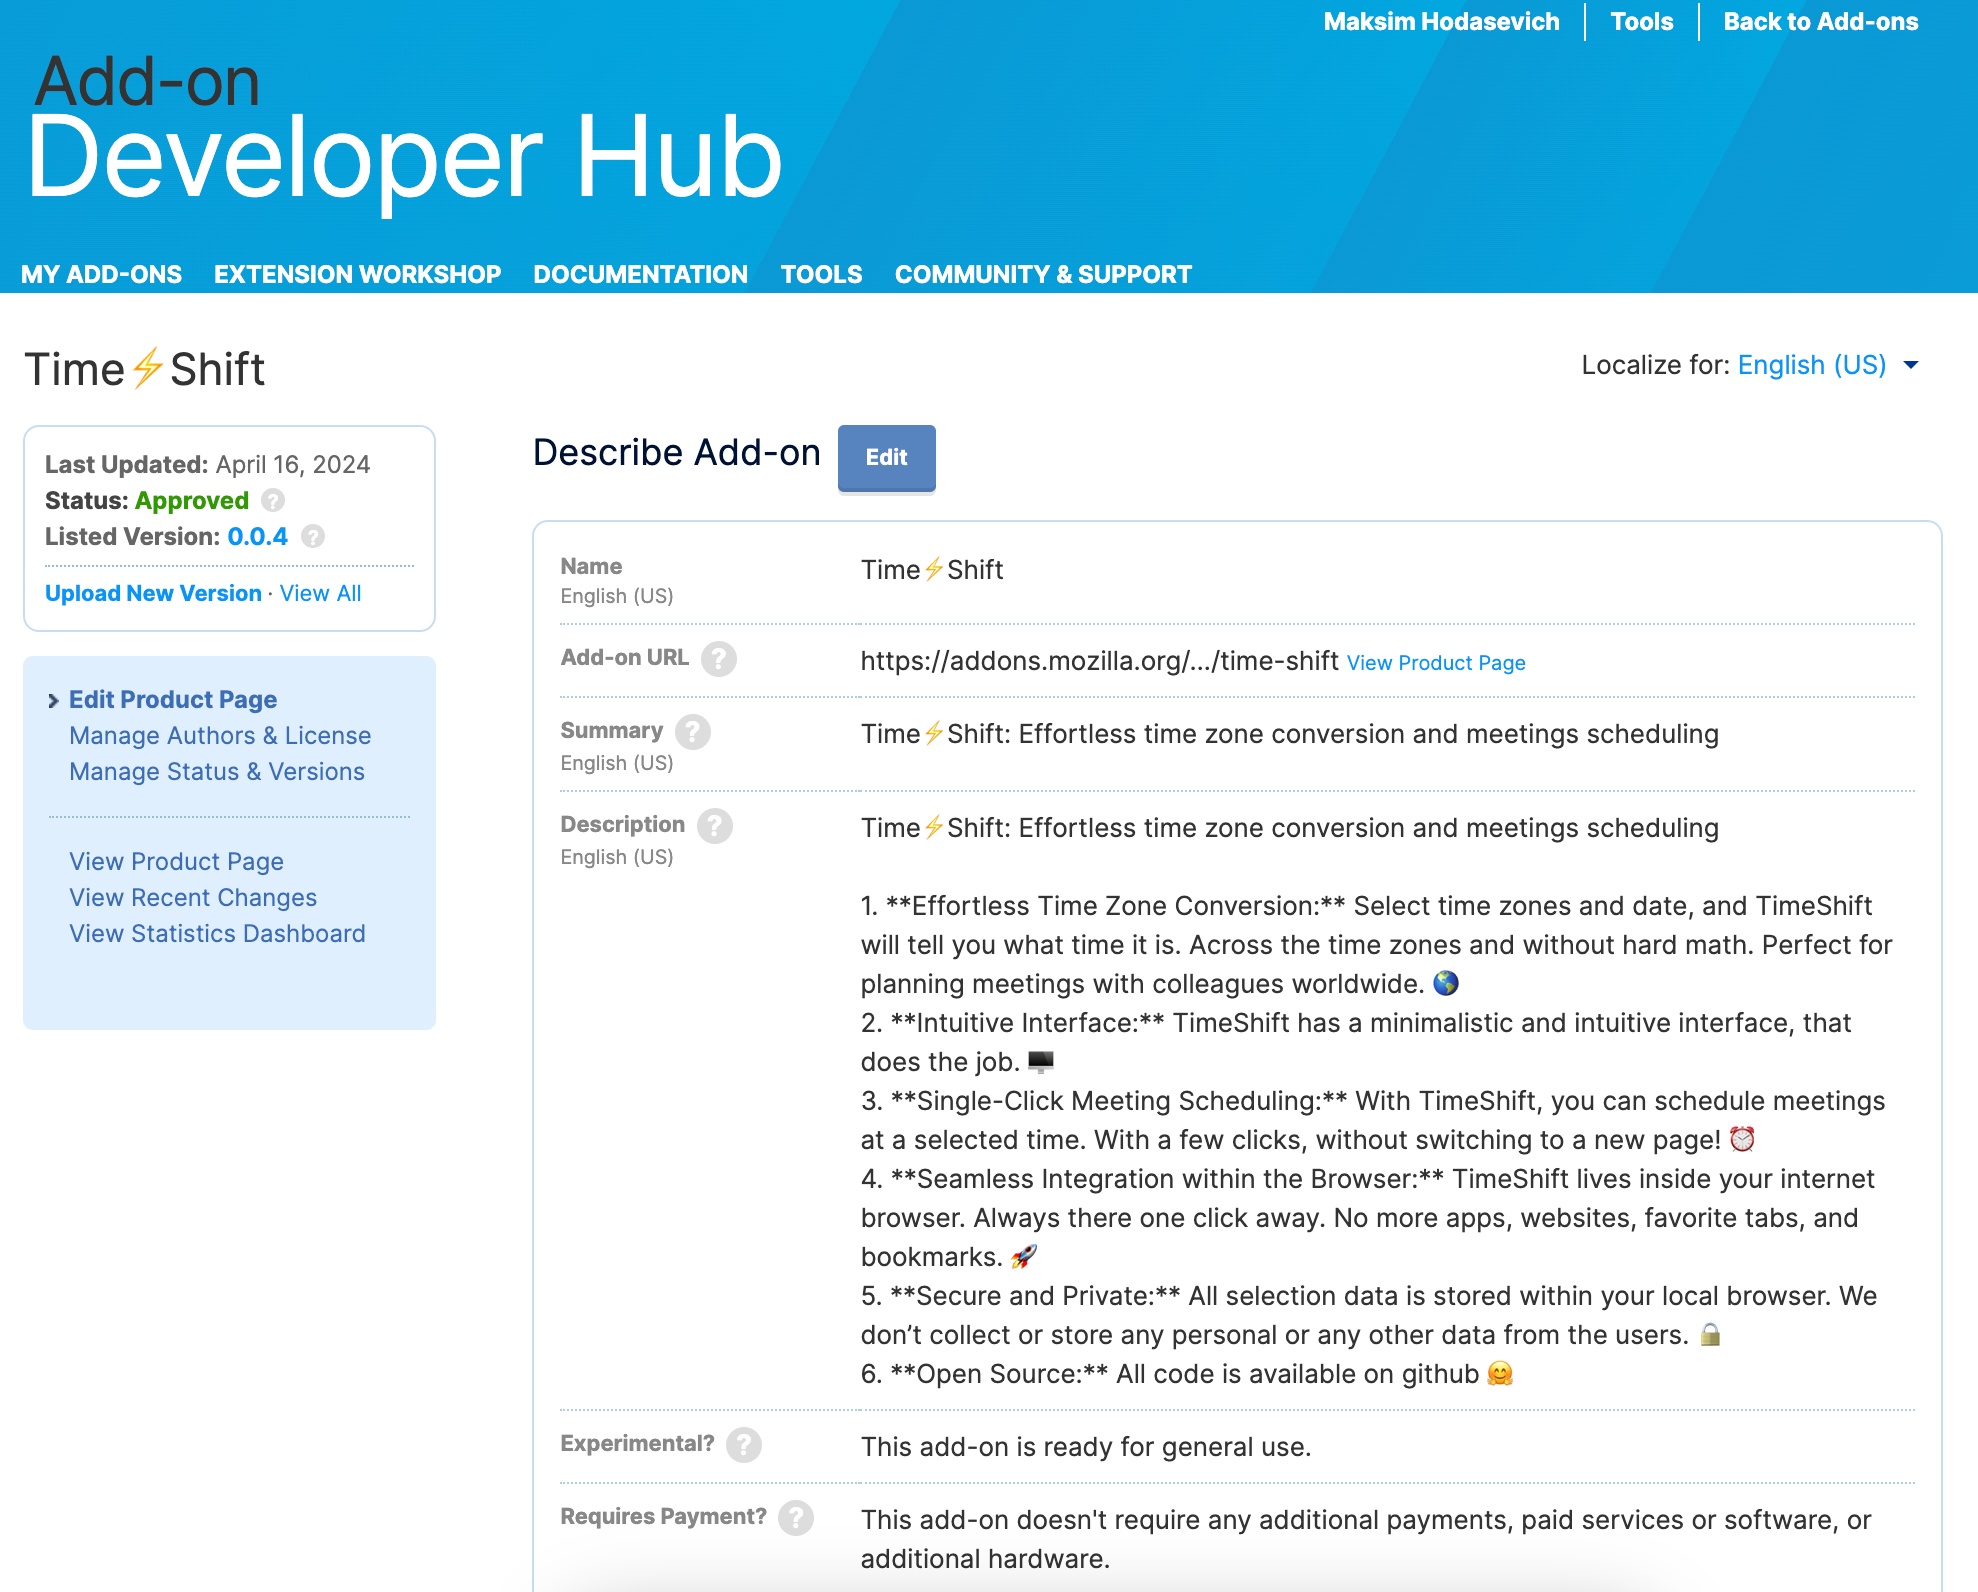
The flow for publishing to the Mozilla store is pretty much the same, but they have fewer fields form. And you can reuse the same data and assets you prepared for Chrome listing, so it won't take much time.
Here is how the Mozilla page looks:
Publishing
When you finish adding info and assets, nothing stops you from hitting the submit for review button.
On both platforms, the first review takes about 3-5 days, and subsequent ones 1-3 days.
Analytics and feedback
It's important to gain as much data about the user's behavior as possible.
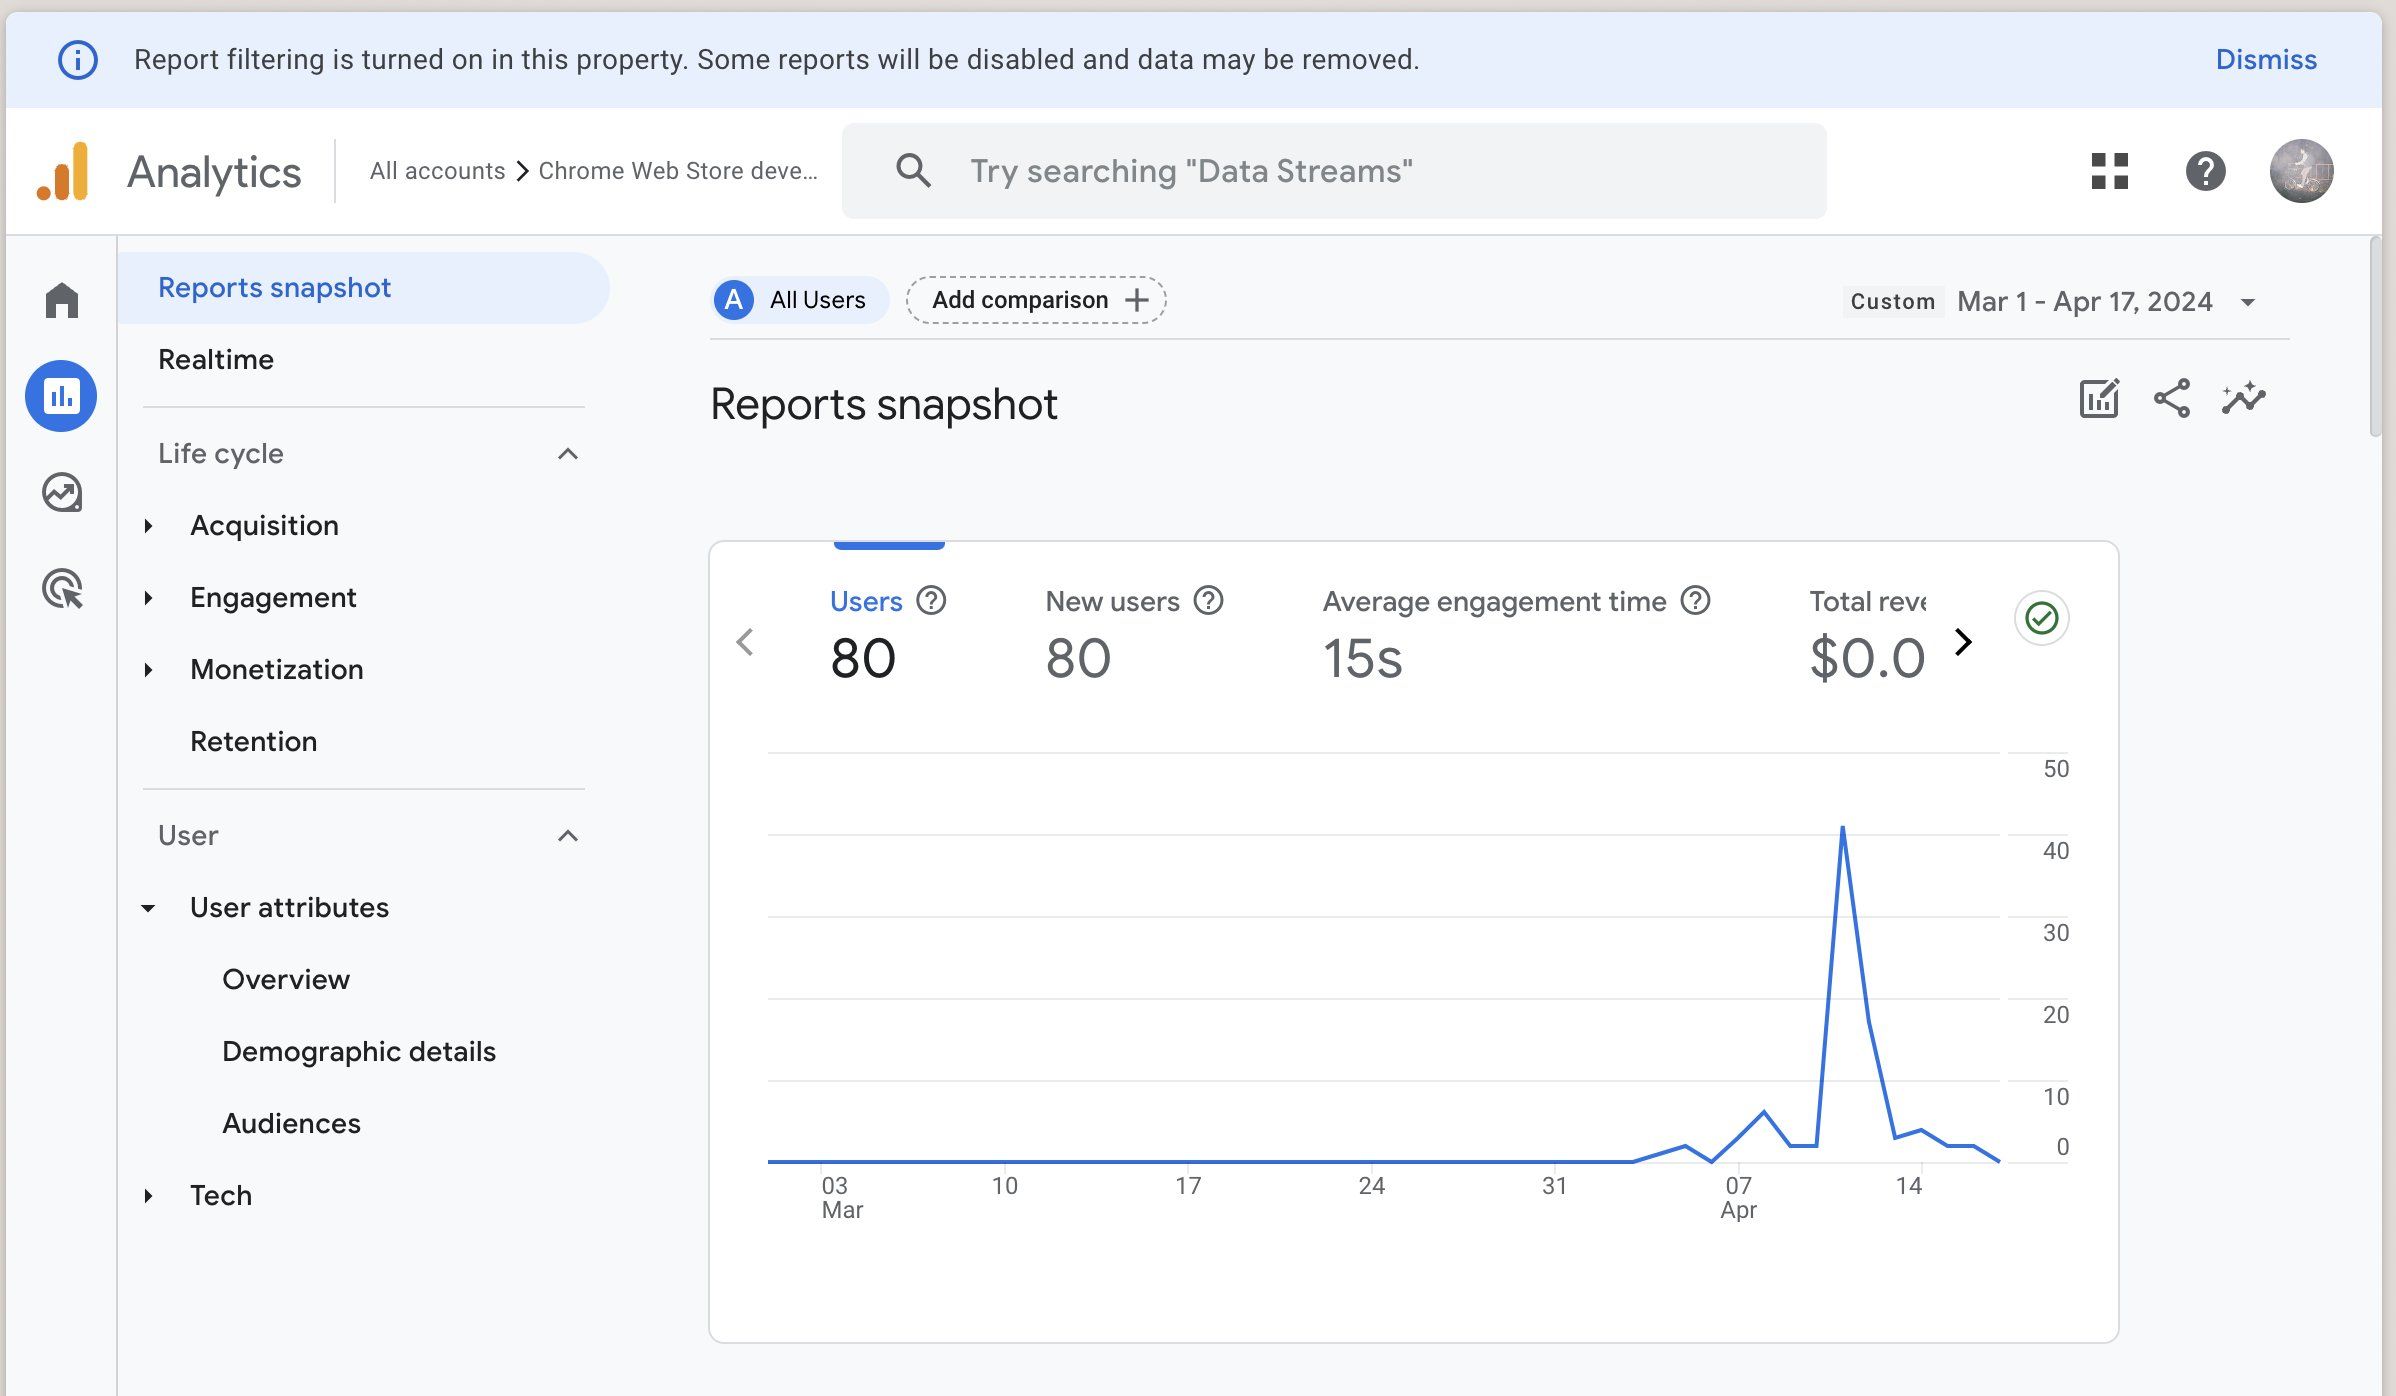
Google allows you to turn on Google Analytics right away. GA will be set up from the start and you will be able to see user's starts, geographics, and more.
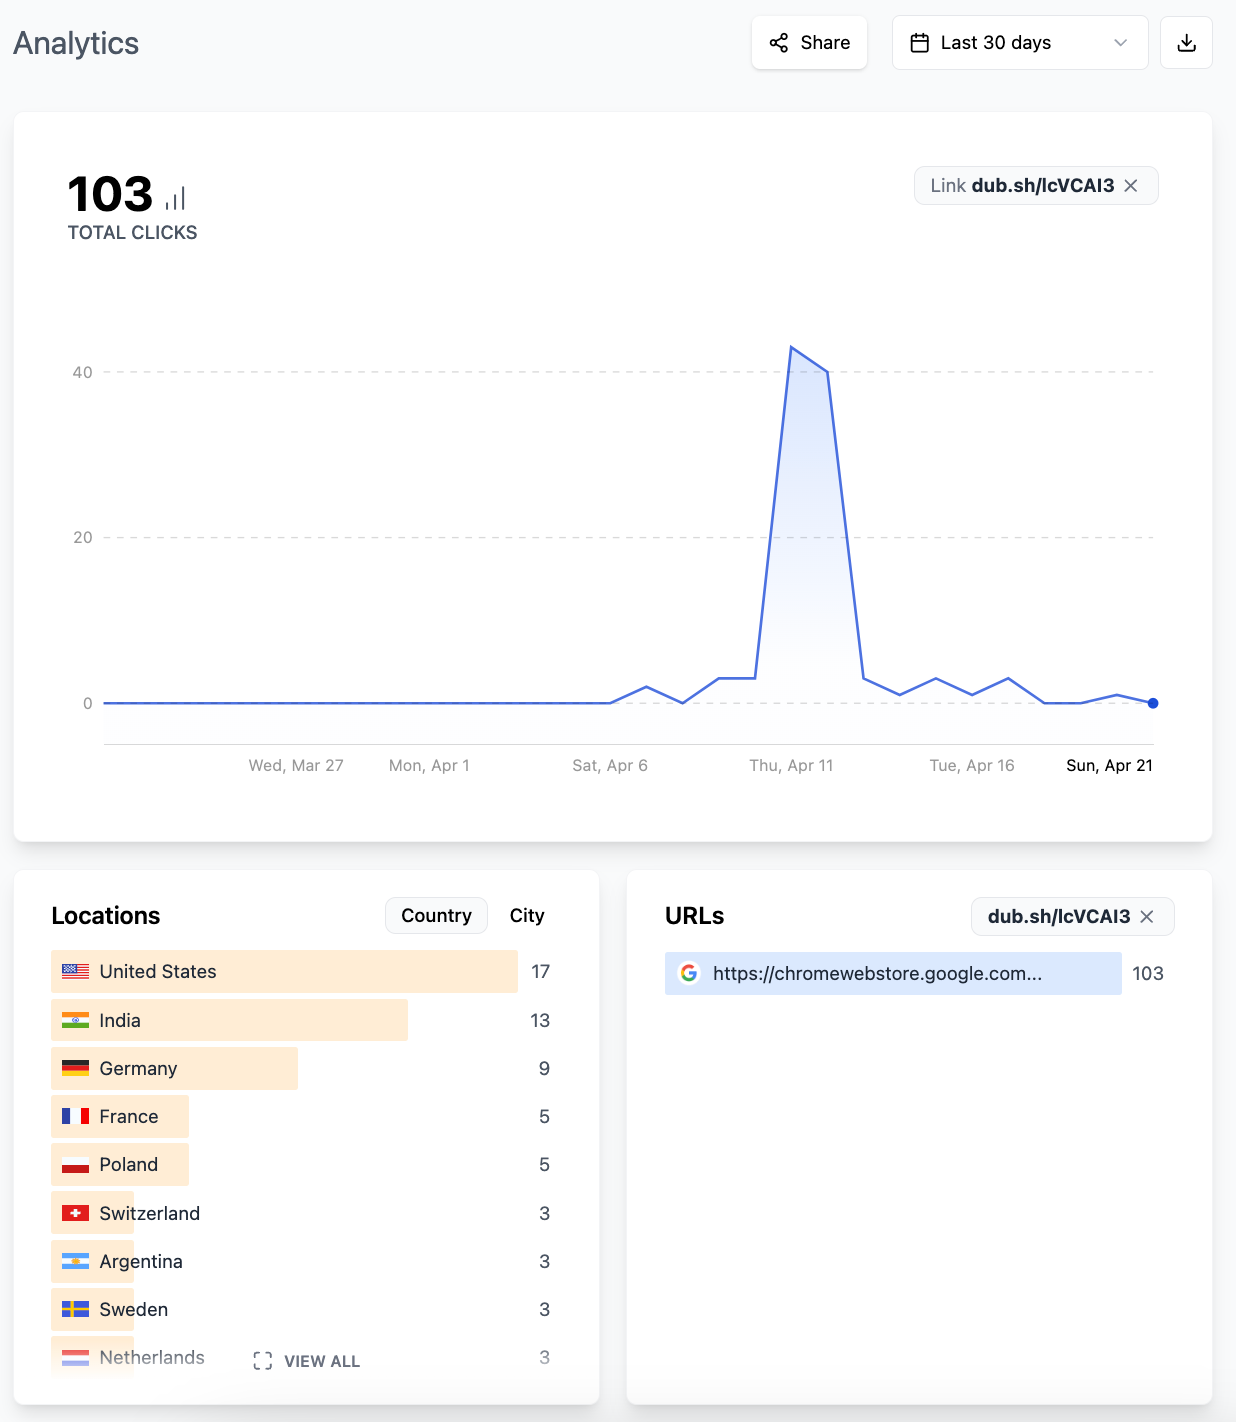
One more tool you could use to collect some starts is Dub. Dub is a link shortener but with analytics.
You can use it to create short links to your extension page and use it in social media posts.
For example, you could create one link for X and one for Linkedin and analyze which place drives you more traffic.
Conclusion
The publication part in its essence is easy.
But the hard thing (or at least for me) is to create copy and presenting assets. These are the first things users will see and they need to be done right.
It's awesome if you have a design person working with you on the project. It will help you to parallel work and decrease your timeline to the first published version.
Talk to users if you can. If you don't have active users, try to find couple of people who will give you a feedback, so you can iterate based on that (X or LinkedIn can help).
And have a happy hacking!